We are an independent third-party support provider and are not affiliated with, authorized, or endorsed by any brand mentioned on this website.
We are an independent third-party support provider and are not affiliated with, authorized, or endorsed by any brand mentioned on this website.
Complete Eufy Setup Guide
Get Your Eufy Security Camera Up and Running in No Time
- Contact Us
- Get Immediate Support
One-Stop Eufy Camera Setup & Troubleshooting Guide
Eufy security camera setup doesn’t have to be complicated. Whether you’re installing an indoor camera, outdoor cam, or looking to setup Eufy doorbell, this eufy setup guide will walk you through the complete steps on how to setup eufy camera. From the standard app-based flow to manual and Ethernet options, you’ll find detailed information on the same. Follow the steps that match your device and network, and you’ll have Eufy camera setup process complete in minutes.
How To Setup Eufy Camera?
Before initiating the Eufy camera setup, there are some prerequisites you should check and prepare to prevent any disruptions during the process.
Setup Eufy Using the Eufy Security App (Most Common Method)
Eufy Security app is the main platform where you can set up your Eufy camera and it’s suitable for use with almost any Eufy product in the market.
- First, install the Eufy Security app and complete the eufy account setup process or sign in if you already have an account.
- Go to the homepage and press the “+” button. Choose your model among the options available.
- The app will then lead you through a series of steps that include scanning the camera’s QR code, connecting it to Wi-Fi, and naming it.
- Soon enough, the live stream will be up on the dashboard.
After configuration, spend some time adjusting the sensitivity level, notification settings, and storage. Additionally, the application enables you to verify whether you have firmware update notifications on your eufy camera; this will help you apply any updates instantly after configuration, ensuring optimum functioning and security.

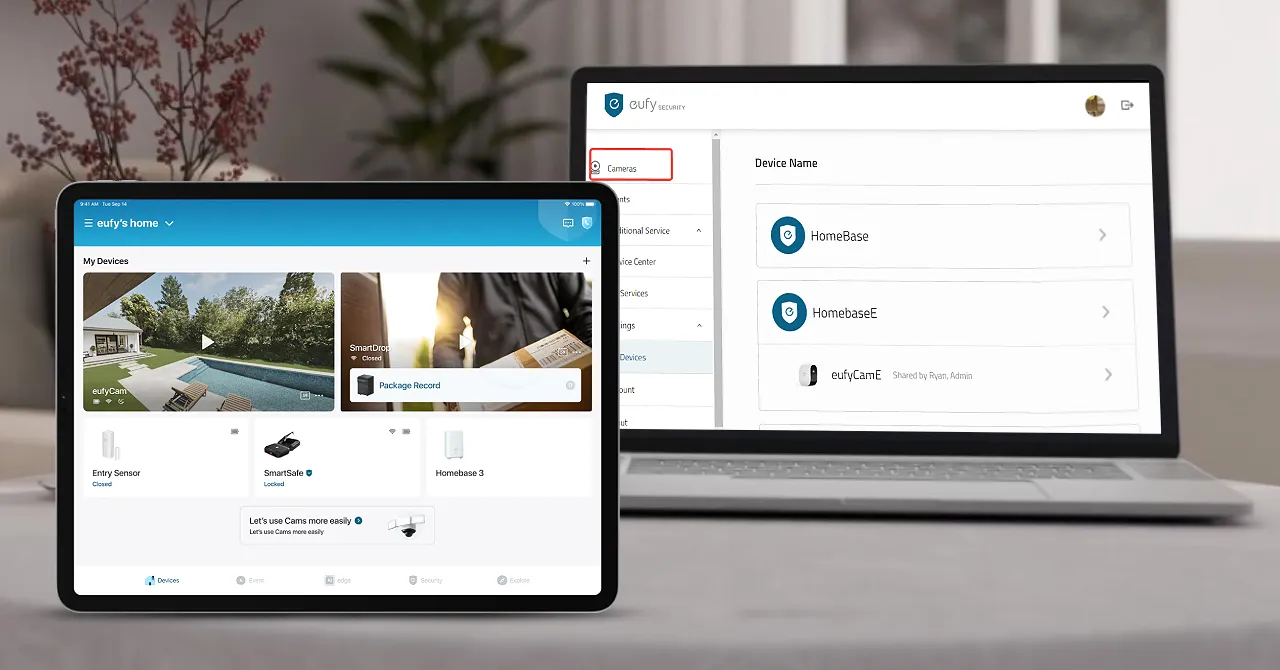
Eufy Setup Process Via Web Portal
Users who opt for a desktop experience or need to set up specific compatible devices can use the Eufy website at eufy.com to do a browser-based setup.
- Visit www.eufy.com and complete the Eufy login process.
- Then go to “Add Device” under the dashboard menu. You will be presented with step-by-step instructions displayed right in front of you depending on the make of the device you are using.
- It is important to understand that this process can only be done with selected models by Eufy.
- If you don’t see your model, use the mobile application instead.
How To Setup Eufy Camera With QR Code?
QR code authentication has been included in the eufy camera’s default set-up procedure and serves as the primary way of identifying cameras with users’ accounts.
- A QR code will be generated on your phone display in the course of the set-up process in the Eufy Security Camera Setup App.
- Keep the code at a distance of about 20 cm to 30 cm from the camera’s lens until you hear a beep sound.
- The device will read the code in order to connect it to your account as well as receive Wi-Fi credentials. Ensure that your mobile’s display is brightly lit without any reflections on its screen.
Eufy Security Camera Setup with HomeBase
EufyHomeBase acts as the primary hub that connects EufyCam and certain other models of cameras, allowing the camera to store its content locally and expand its range by wirelessly connecting to it. The eufy home base setup is essential before installing the camera itself.
For setting up HomeBase, plug in HomeBase to an electrical socket, and then connect the device with your router via the Ethernet cable provided. Go to the Eufy Security app, press +, and choose HomeBase from the list of devices. HomeBase will be automatically detected, and it will lead you through the entire process of connecting. Now, as soon as HomeBase is connected, all you have to do is connect cameras with it through the app.
Set Up Eufy Camera With Bluetooth (Auto Detection)
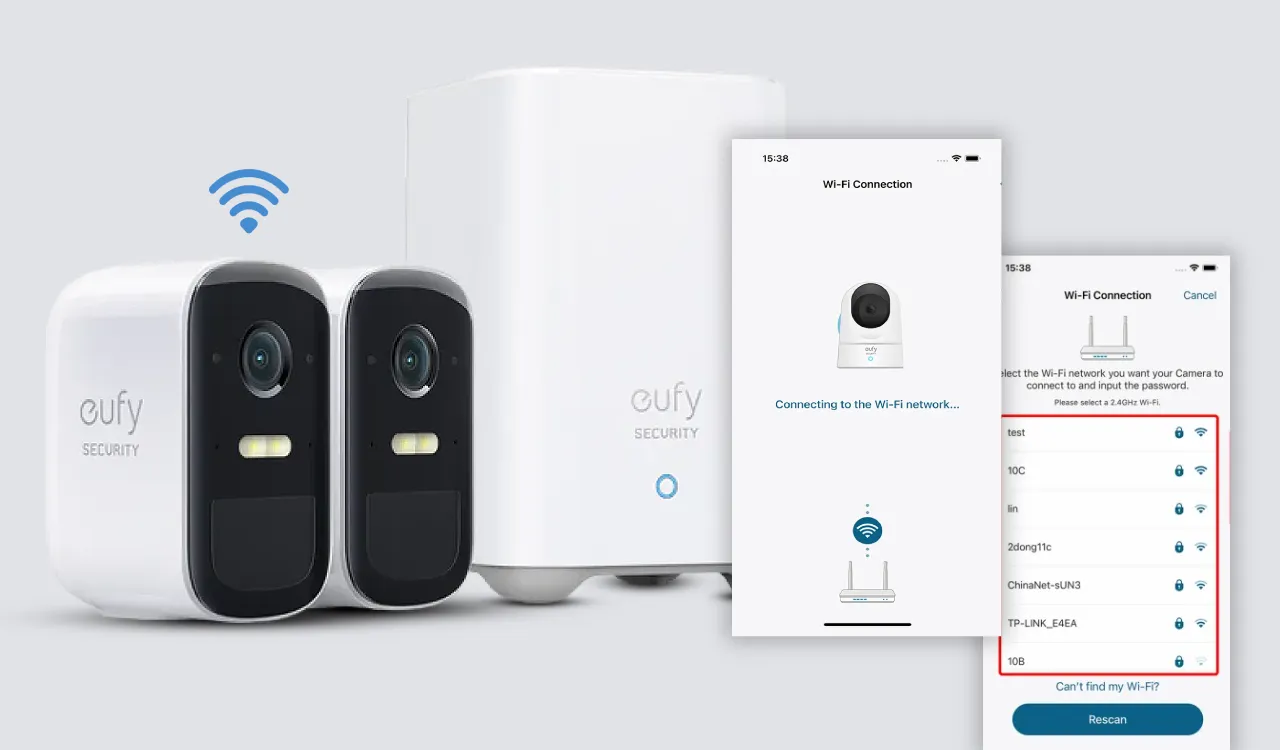
Eufy Camera WiFi Setup
When Bluetooth and QR code detection fails, the Eufy Security app provides an alternative way to connect to Wi-Fi by entering network details manually.
In the application, once you select the device type, scroll down the installation page and select the “Connect Wi-Fi Manually” or “Trouble?” option. After that, you will be asked to choose your Wi-Fi network from the list provided and insert the password for it. The app then transmits this information directly to the camera using local networking only. This procedure will work great when you want to eufy setup wifi settings wherein both 2.4 GHz and 5 GHz use one SSID and cannot detect properly through auto setup.
Make sure your phone is on the same 2.4 GHz Wi-Fi network that you want to connect your camera to. If your phone is on the 5 GHz Wi-Fi during the process, your camera won’t get the right network information.
Eufy Security Camera Setup with HomeBase
For those cameras that do not support QR scan or Bluetooth scan, the manual entry of the serial number is a surefire backup feature provided in the eufy installation guide.
When installing the camera via the Eufy Security application, look for the option to “Enter SN Manually” or “Can’t scan the QR code?” under the scan window. The serial number (SN) will be located at the back or bottom of your camera and may be next to the button to reset it. You will need to input the SN precisely and then continue with the remaining steps. This approach makes it possible for a camera whose QR code is damaged to have its eufy camera setup done successfully.

How To Setup Eufy With Ethernet Connection
A select number of Eufy models are compatible with Ethernet installation for people who would prefer a hardwired connection that is more dependable, especially when operating in areas with heavy Wi-Fi congestion. For the Ethernet installation process, you simply need to connect your device to the router through an Ethernet cable, then switch the device on.
Open the Eufy Security app and pair the device in the usual way. The device will be discovered via your home’s local network, and the setup process will take place automatically without the need to enter your Wi-Fi information. This is the suggested installation procedure when using HomeBase, especially for indoor devices that are close enough to your router for an Ethernet cable.
Common Eufy Setup Problems And Their Easy Solutions
Even with a straightforward eufy setup guide, a few common issues come up regularly. Here’s how to fix each one quickly.
Using 5GHz Instead of 2.4GHz to Set Up Eufy
This is among the most common reasons for the inability to complete the setup process. Almost all Eufy cameras are capable of operating on the 2.4 GHz band Wi-Fi only. It implies that if you try to establish connection with the 5 GHz band, then you will not be able to do it. In case your router uses both bands with the same name, access the router settings and create different networks for each one.
Eufy Camera Not Connecting to Wi-Fi
Eufy Camera Wrong Wi-Fi Password Error
Eufy QR Code Not Scanning
Eufy App Not Detecting Camera
Eufy Firmware Update Failed
Eufy Device Offline After Setup
Eufy HomeBase Not Syncing
Frequently Asked Questions
Why is my Eufy camera not connecting to Wi-Fi?
The most probable cause for this issue is that your device is trying to connect to the 5GHz frequency, which isn’t supported by most Eufy security cameras. Ensure that your smartphone is connected to the 2.4GHz frequency when you do a eufy camera setup, and verify that the Wi-Fi password is correct.